For our ceramics workshop I decided to complete six tiles showing the changes throughout the seasons.
I began my kneading the clay, this is required to remove any air bubbles within the clay so that when fired there is far less chance that the work will break in the heat.
I then used a rolling pin and wood measure to roll out the clay so that it was all to one thickness and the tiles would all be uniform.
I next cut out the square base for each tile keeping them all to the same dimensions.
For the next step I decided that I wanted to express the passing through the seasons via the symbolic blossom. To create this I decided at this scale creating the branches solely out of clay and to add the flowers at the later stage of glazing.
I rolled out clay into small cylinders and attached them to the tile base with slip (a mixture of clay and water) in a branch like shape.

Once the branches were attached I smoothed them using more slip so the harsh edges blended more with the base.
As seen in the photo above I used a sharpe tool to add some texture to the branches as well as a kimono inspired detailing in the tiles free space. They were then ready for firing.
UPDATE:
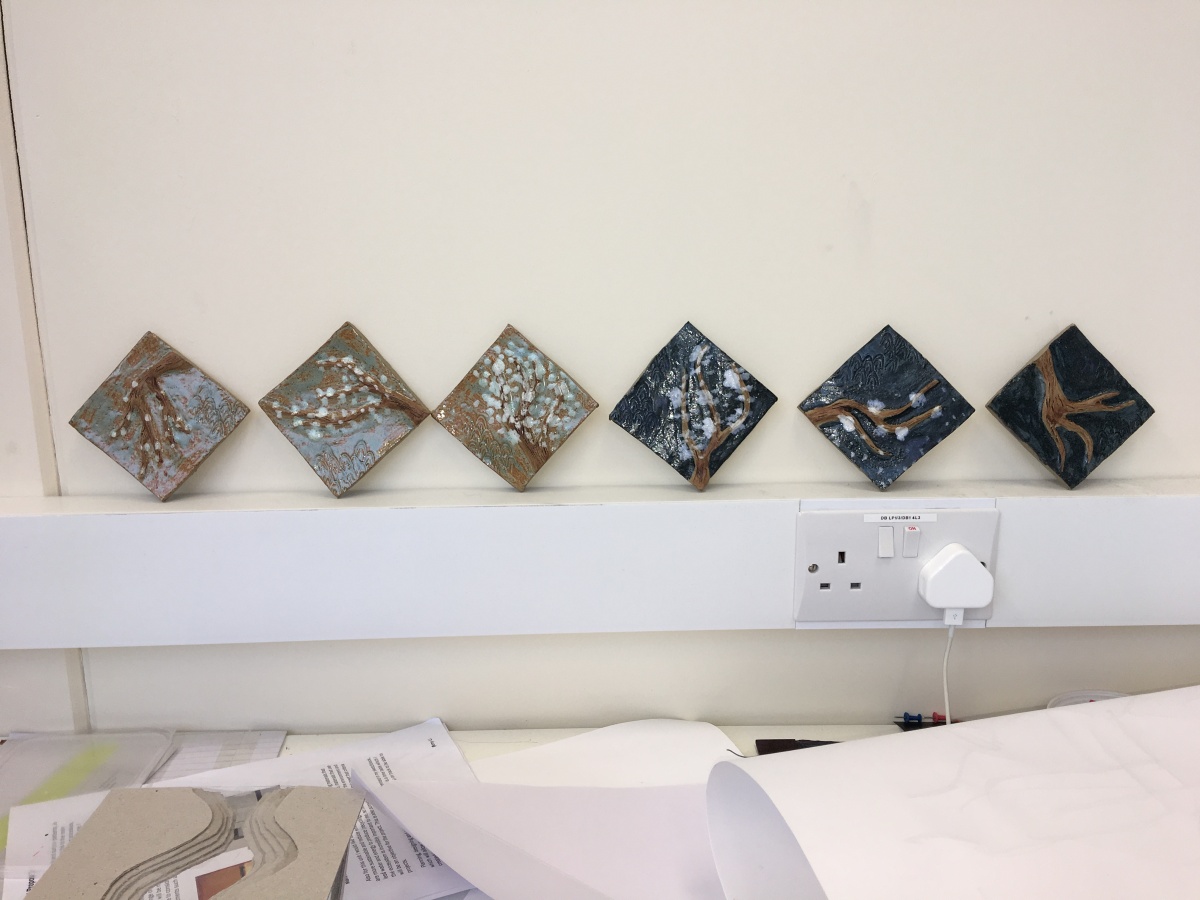
I decided to make these pieces the experimental pieces for my unit 10 ceramics works in that I tested different possible glazes on them. Below are how they turned out with the glazed detailing and petals.
I believe my ceramic work in unit 10 benefited by the practice that this workshop enabled and I think the pieces reached the look and standard that I was aiming towards.